Connections and APIs
To access metadata sources from various database systems and REST APIs, you can define Connection- and API-Configurations under the section “Connections / APIs”.
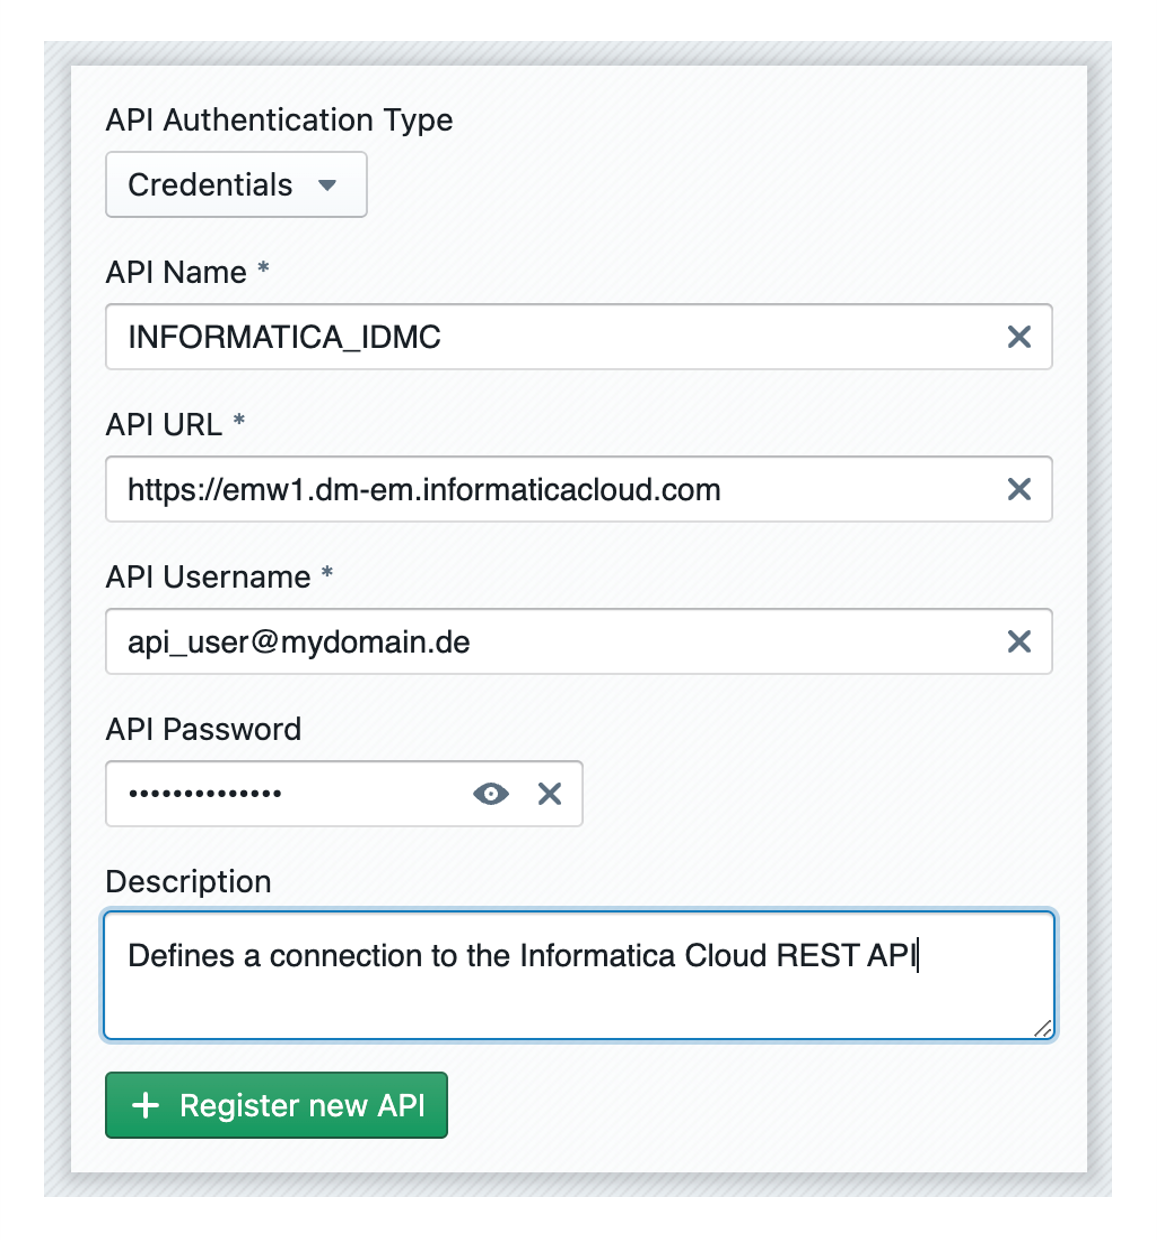
The first property of the connection you have to define is the Authentication Type. Depending on the type you will see more properties, like the URL, Username, Password or Hostname/Port.
After creating the Connection/API it will be available in the application and could be used to read metadata from source systems, deploy build results to target systems or fetch mappings from Informatica.
Connection Types
The following connections types are currently supported:
- REST API
- Informatica Data Management Cloud
- Azure Synapse Analytics
- Microsoft Fabric
- Snowflake (SQL)
- Snowflake (API)
- Salesforce
- PostgreSQL
- AWS Redshift
- GCP BigQuery
- Apache Hive
- Databricks (SQL)
- Databricks (API)
- SQL Server
- Oracle
- MySQL
- MariaDB
- Db2
- Flat File
- PowerCenter
- Git
Create a Connection
To create a new connection, go to the 'Connections' section in the admin area. There you can create a connection under Create a new Connection at the top. First, you must select the type of connection. A list of possible connection types is provided above. Next, assign a name to the connection. Depending on the connection type, various other properties must be set. Finally, the connection can be created using + Create Connection. It will then appear at the bottom of the list of all connections.
Edit an existing Connection
An existing connection can be changed at any time. To do this, click on the edit icon (![]() ) at the top of the connection. An editor will open where all the properties of the connection can be changed. After making changes, click Update Connection at the bottom to save the changes.
) at the top of the connection. An editor will open where all the properties of the connection can be changed. After making changes, click Update Connection at the bottom to save the changes.
Environment Variables
Instead of entering values directly for connection properties, it is also possible to use connection variables. These variables can then be set differently for each user. For example, it is possible to establish a connection to a target platform, but allow each user to use their own user name.
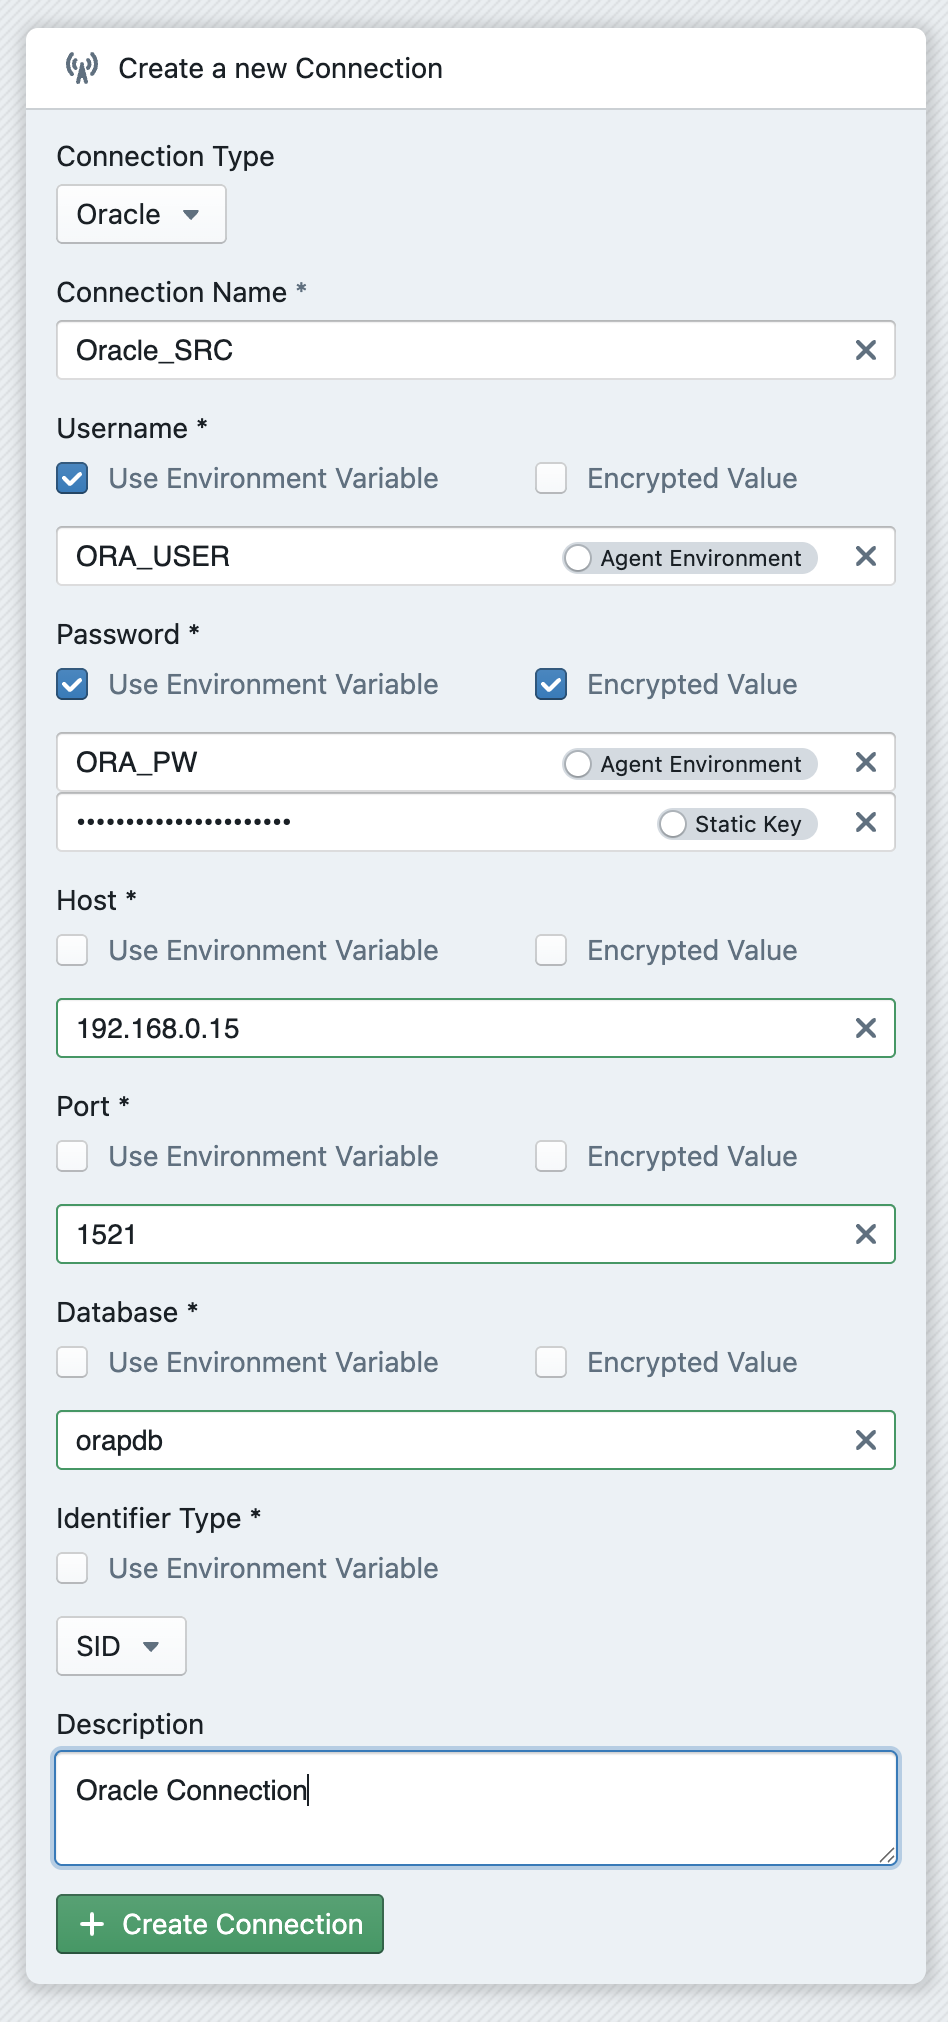
To use a variable for a connection property, activate the Use Environment Variable checkbox for a property. You can now enter the name of the environment variable in the text field. There are two types of variables: Agent Environment and User Variable. You can switch between these two using the switch on the right-hand side of the text field. With Agent Environment, the variables are searched for on the system on which your agent is running, i.e. environment variables that you have set in the operating system. With User Variable, the variables that you have set in the profile are accessed.
Setting Agent Variables
The Agent Reference explains how you can set variables in the agent's environment. The values of these variables are requested by the agent at runtime and used to connect to the desired target platform.
Change of variable values
After you have changed the value of an environment variable in the operating system, it is necessary to restart the agent.
Setting User Variables
If a user variable has been stored in a connection, all users who want to use this connection must create the corresponding variable. This can be done in the user's profile. Instructions on how to define variables there can be found here.
Encrypting variable values
It is possible to store variable values in encrypted form. An encrypted value is then set either in an environment variable of the operating system or in a user variable.
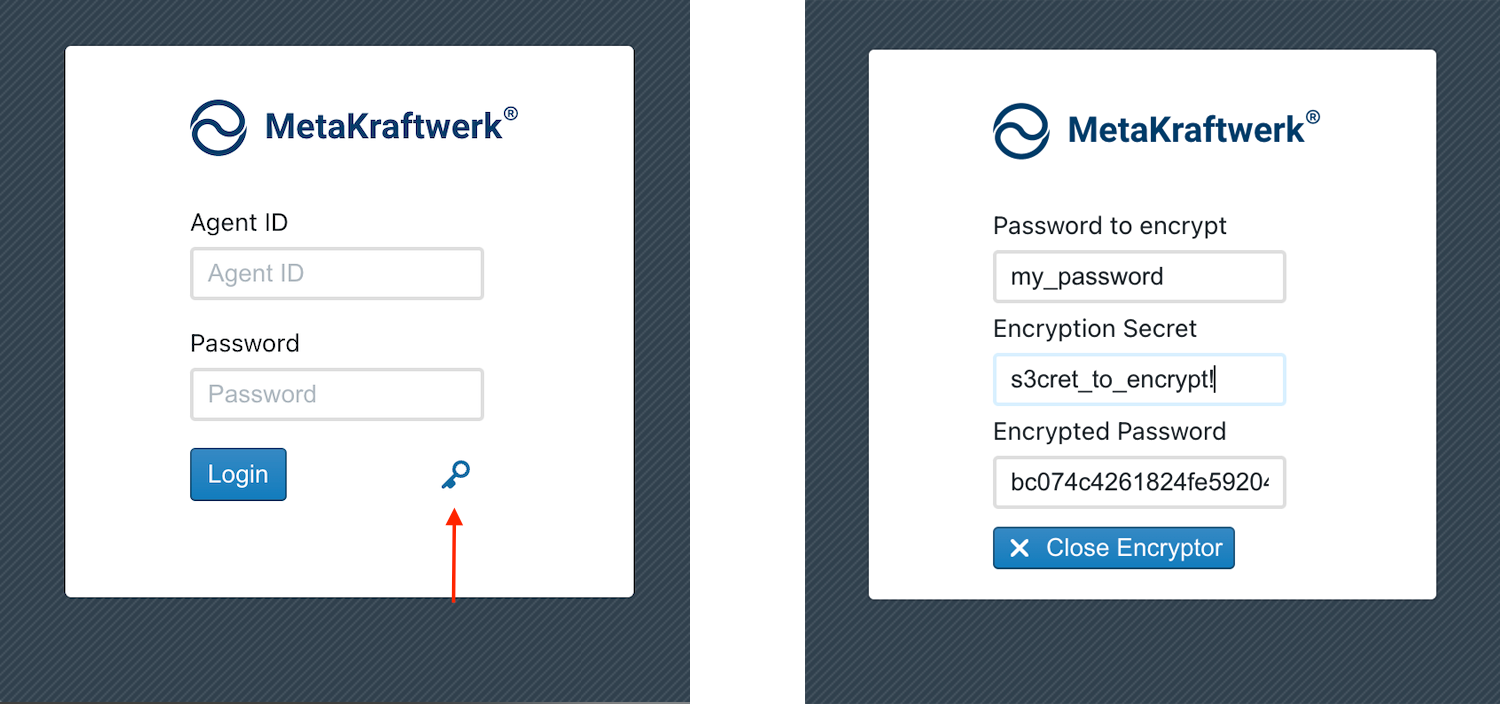
To encrypt any value, use the agent. Open the agent on your system. If you are already logged in, log out. A key icon (![]() ) will now be visible in the bottom right-hand corner. Clicking on it opens a window in which a value can be encrypted using a secret. Enter the value you want to encrypt in the first text field. In the second text field, you must now enter a secret that you have chosen yourself. The encrypted value will now appear in the third text field. Double-click on it to select it and copy it using Ctrl+C. Now insert this encrypted value into your variable.
) will now be visible in the bottom right-hand corner. Clicking on it opens a window in which a value can be encrypted using a secret. Enter the value you want to encrypt in the first text field. In the second text field, you must now enter a secret that you have chosen yourself. The encrypted value will now appear in the third text field. Double-click on it to select it and copy it using Ctrl+C. Now insert this encrypted value into your variable.
In order for the value to be decrypted at runtime, the secret must be stored in the connection. To do this, first activate the Encrypted Value checkbox for the connection property for which you have encrypted the value. Another text field will appear. Here you can enter the secret directly if you select Static Key. In this case, all users must choose the same secret. However, it is also possible to store the secret as a User Key. To do this, click on the switch to change from Static Key to User Key. Now enter the name of the user key in which the secret is to be stored in the text field. You must now create a user key with exactly this name for your user in the profile and store your secret in this key. See the instructions for this in the profile reference.