 MetaKraftwerk
Part 3 — Synapse: Prepare and Create a Notebook
1. Create Storage account and assign role to your Synapse Workspace
- Open the Azure Portal: Create a Storage Account (e.g.
adls2synapseintf). - To assign the
Storage Blob Data Contributorrole to the system-assigned Managed Identity of your Synapse Workspace, proceed as follows: Navigate to the Azure Storage Accountadls2synapseintfthat your Synapse Workspace should access. - Open Access Control (IAM) in the left menu.
- Assign roles: Click on
+ Addand then onAdd role assignment. - Select role: Search for the role
Storage Blob Data Contributorand select it. - Add member: In the "Members" section, select the
Managed identityoption.- Now search for the Synapse Workspace – for system-assigned Managed Identities, the name usually corresponds to the name of the workspace.
- Select the corresponding entry.
- Review and assign the assignment: Click on
Review + assignto assign the role. After completing these steps, the system-assigned Managed Identity of your Synapse Workspace has permission to access Blob Storage.
2. Create the Blob Storage Container and Nested Directories
Navigate to your Azure Storage account
adls2synapseintfin the Azure portal.Under
Data Storge, selectContainers.Click
+ Add Containerand name the containertutorialcontainer→ Choose an access level (e.g., "Private" for secure access) → Create.Navigate into the newly created tutorialcontainer
tutorialcontainer.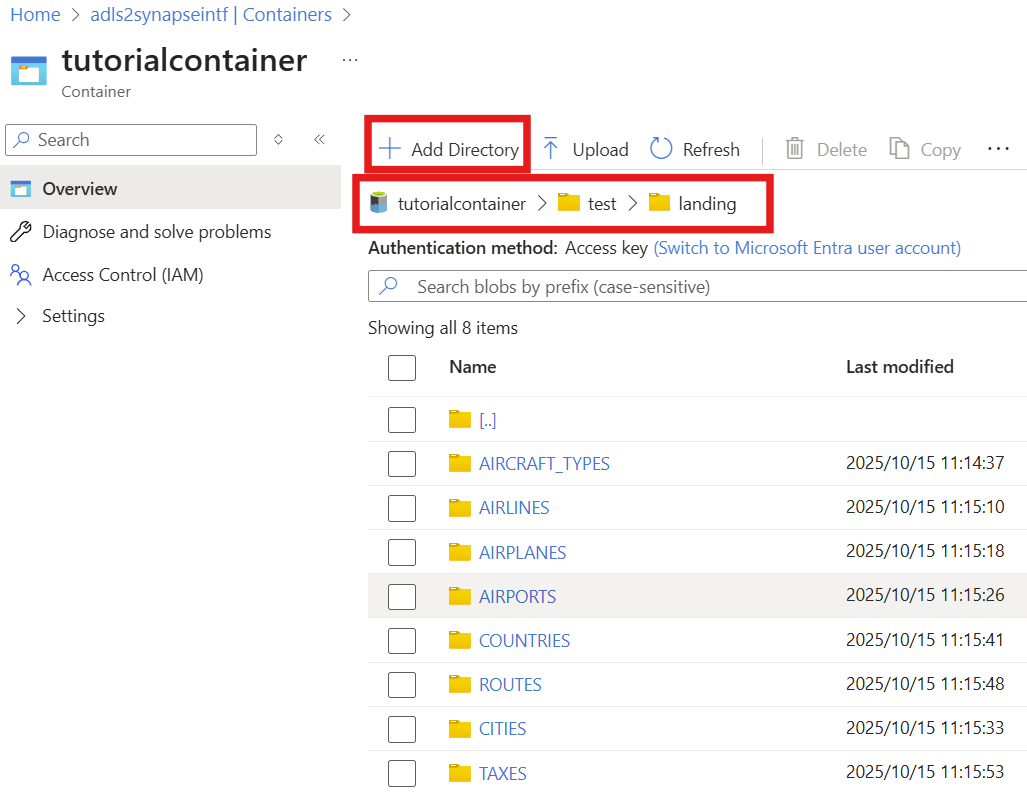
Click
+ Add Directory(from the top menu) and name the directorytest→ Save.Enter the test directory, then use
+ Add Directoryagain to create thelandingandbronzedirectory → Save.Enter the
landingdirectory, then use+ Add Directoryonce more to create the directories (e.g.,AIRPORTS, see the screenshot on the right) → Save.
3. Upload the CSV Files
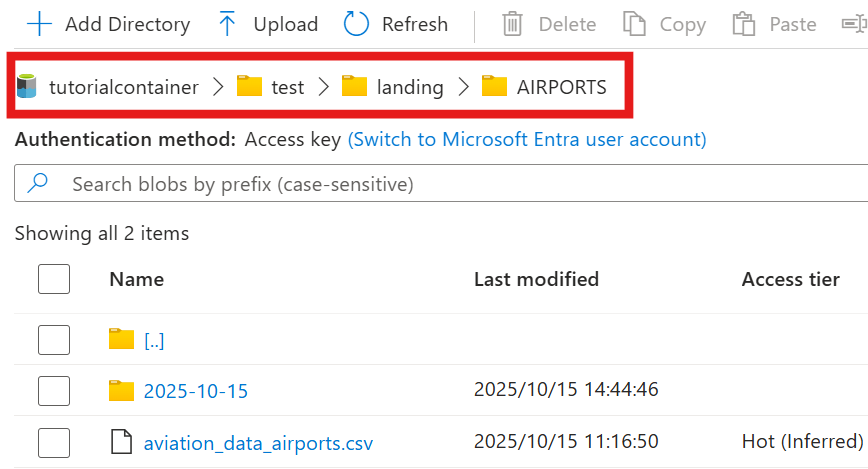
- Download Sample data( csv_landing_data_for_synapse_tutorial.zip ) and extract them.
- Upload each extracted file to the corresponding folder you created earlier, e.g., upload
aviation_data_airports.csvto the foldertutorialcontainer/test/landing/AIRPORTSortutorialcontainer/test/landing/AIRPORTS/2025-10-15.
4. Create a Folder in Synapse Workspace
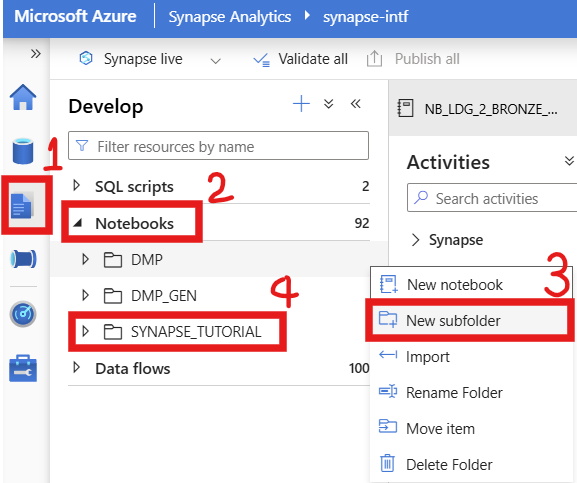
Open Synapse Workspace → Develop → Notebooks → Create a New subfolder named
SYNAPSE_TUTORIAL.In Synapse Workspace → Integrate → Pipelines → Create a Folder also named
SYNAPSE_TUTORIAL.
5. Import a sample notebook
We've created a blank sample notebook that you can import into Synapse. Alternatively, you can create a new one yourself.
- Download sample notebook ( landing_2_bronze.py ).
- Import or copy-paste the Notebook into the
SYNAPSE_TUTORIALfolder in Synapse, name the notebooklanding_2_bronze.
Note:
You can also see a complete list of downloads in Prerequisites.
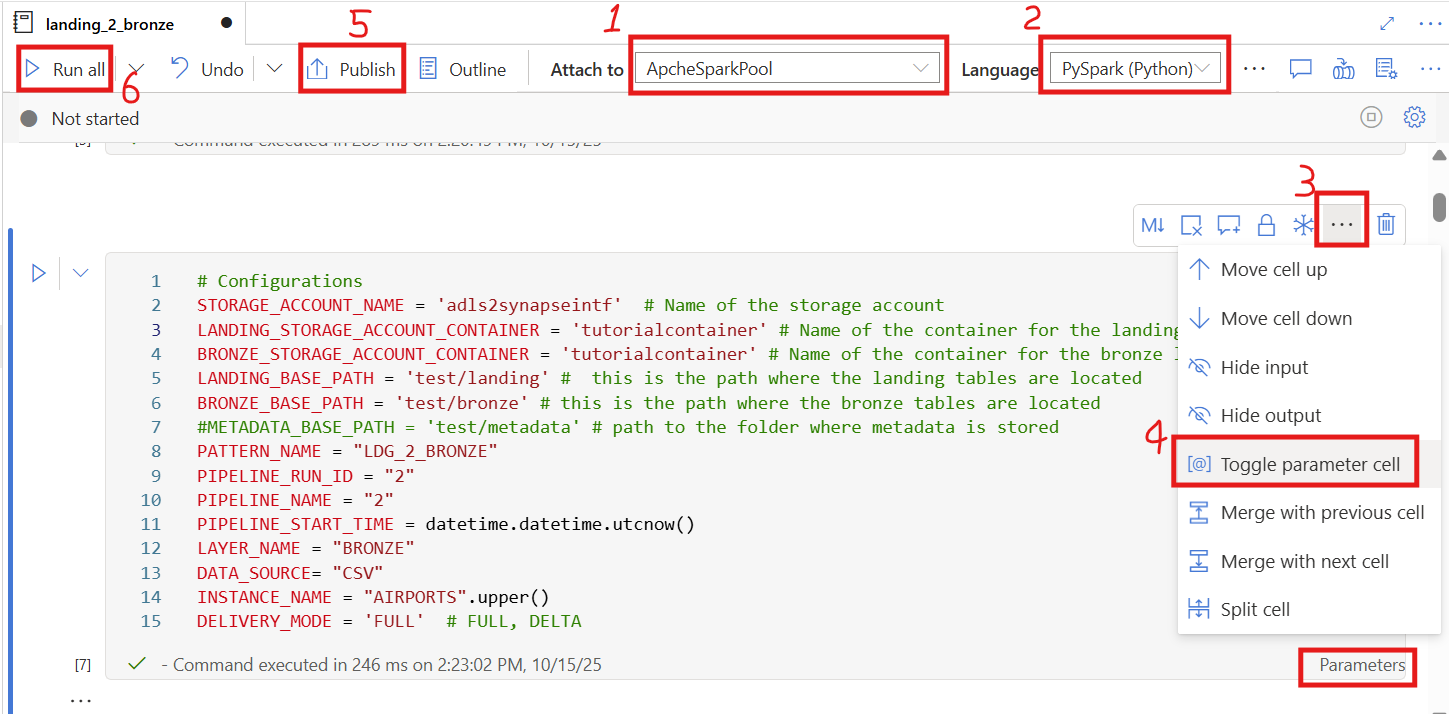
6. Check or adjust the uploaded notebook
Attach to your Spark pool:
Make sure the notebook is attached to the Spark pool you created (e.g.,ApacheSparkPool).Select the language:
ChoosePySpark (Python)as the notebook language.Verify and update configurations:
In the code block labeled# Configurations, ensure that all parameters (such asSTORAGE_ACCOUNT_NAME,LANDING_STORAGE_ACCOUNT_CONTAINER,LANDING_BASE_PATH) exactly match your own Blob Storage settings.⚠️ Even an extra space or typo can cause the notebook to fail.
Enable parameter cell (if needed):
Check whether the wordParametersappears at the bottom-right corner of the cell# Configurations.If it does not appear, click the three dots
…on the top-right of the cell.Then select
Toggle parameter cellfrom the dropdown menu (as shown in the image).Publish:
You can click Publish to save and deploy your notebook.Run the notebook:
Finally, click Run all to test the notebook and make sure it executes successfully.