 MetaKraftwerk
Adding an instance to a release
If an instance is already committed in one release, it is initially not available/editable in the other releases. This situation is indicated by a gray dot on the left side of the instance ![]() . If you switch to a release to which the instance has not yet been added, you will see a dialog that allows you to add the instance to the current release. To do this, first select a release from those that already have commits of the instance. Then select the commit that should serve as the basis for the instance in the current release. Finally, click on "Add to this release" to add the instance to the current release.
. If you switch to a release to which the instance has not yet been added, you will see a dialog that allows you to add the instance to the current release. To do this, first select a release from those that already have commits of the instance. Then select the commit that should serve as the basis for the instance in the current release. Finally, click on "Add to this release" to add the instance to the current release.
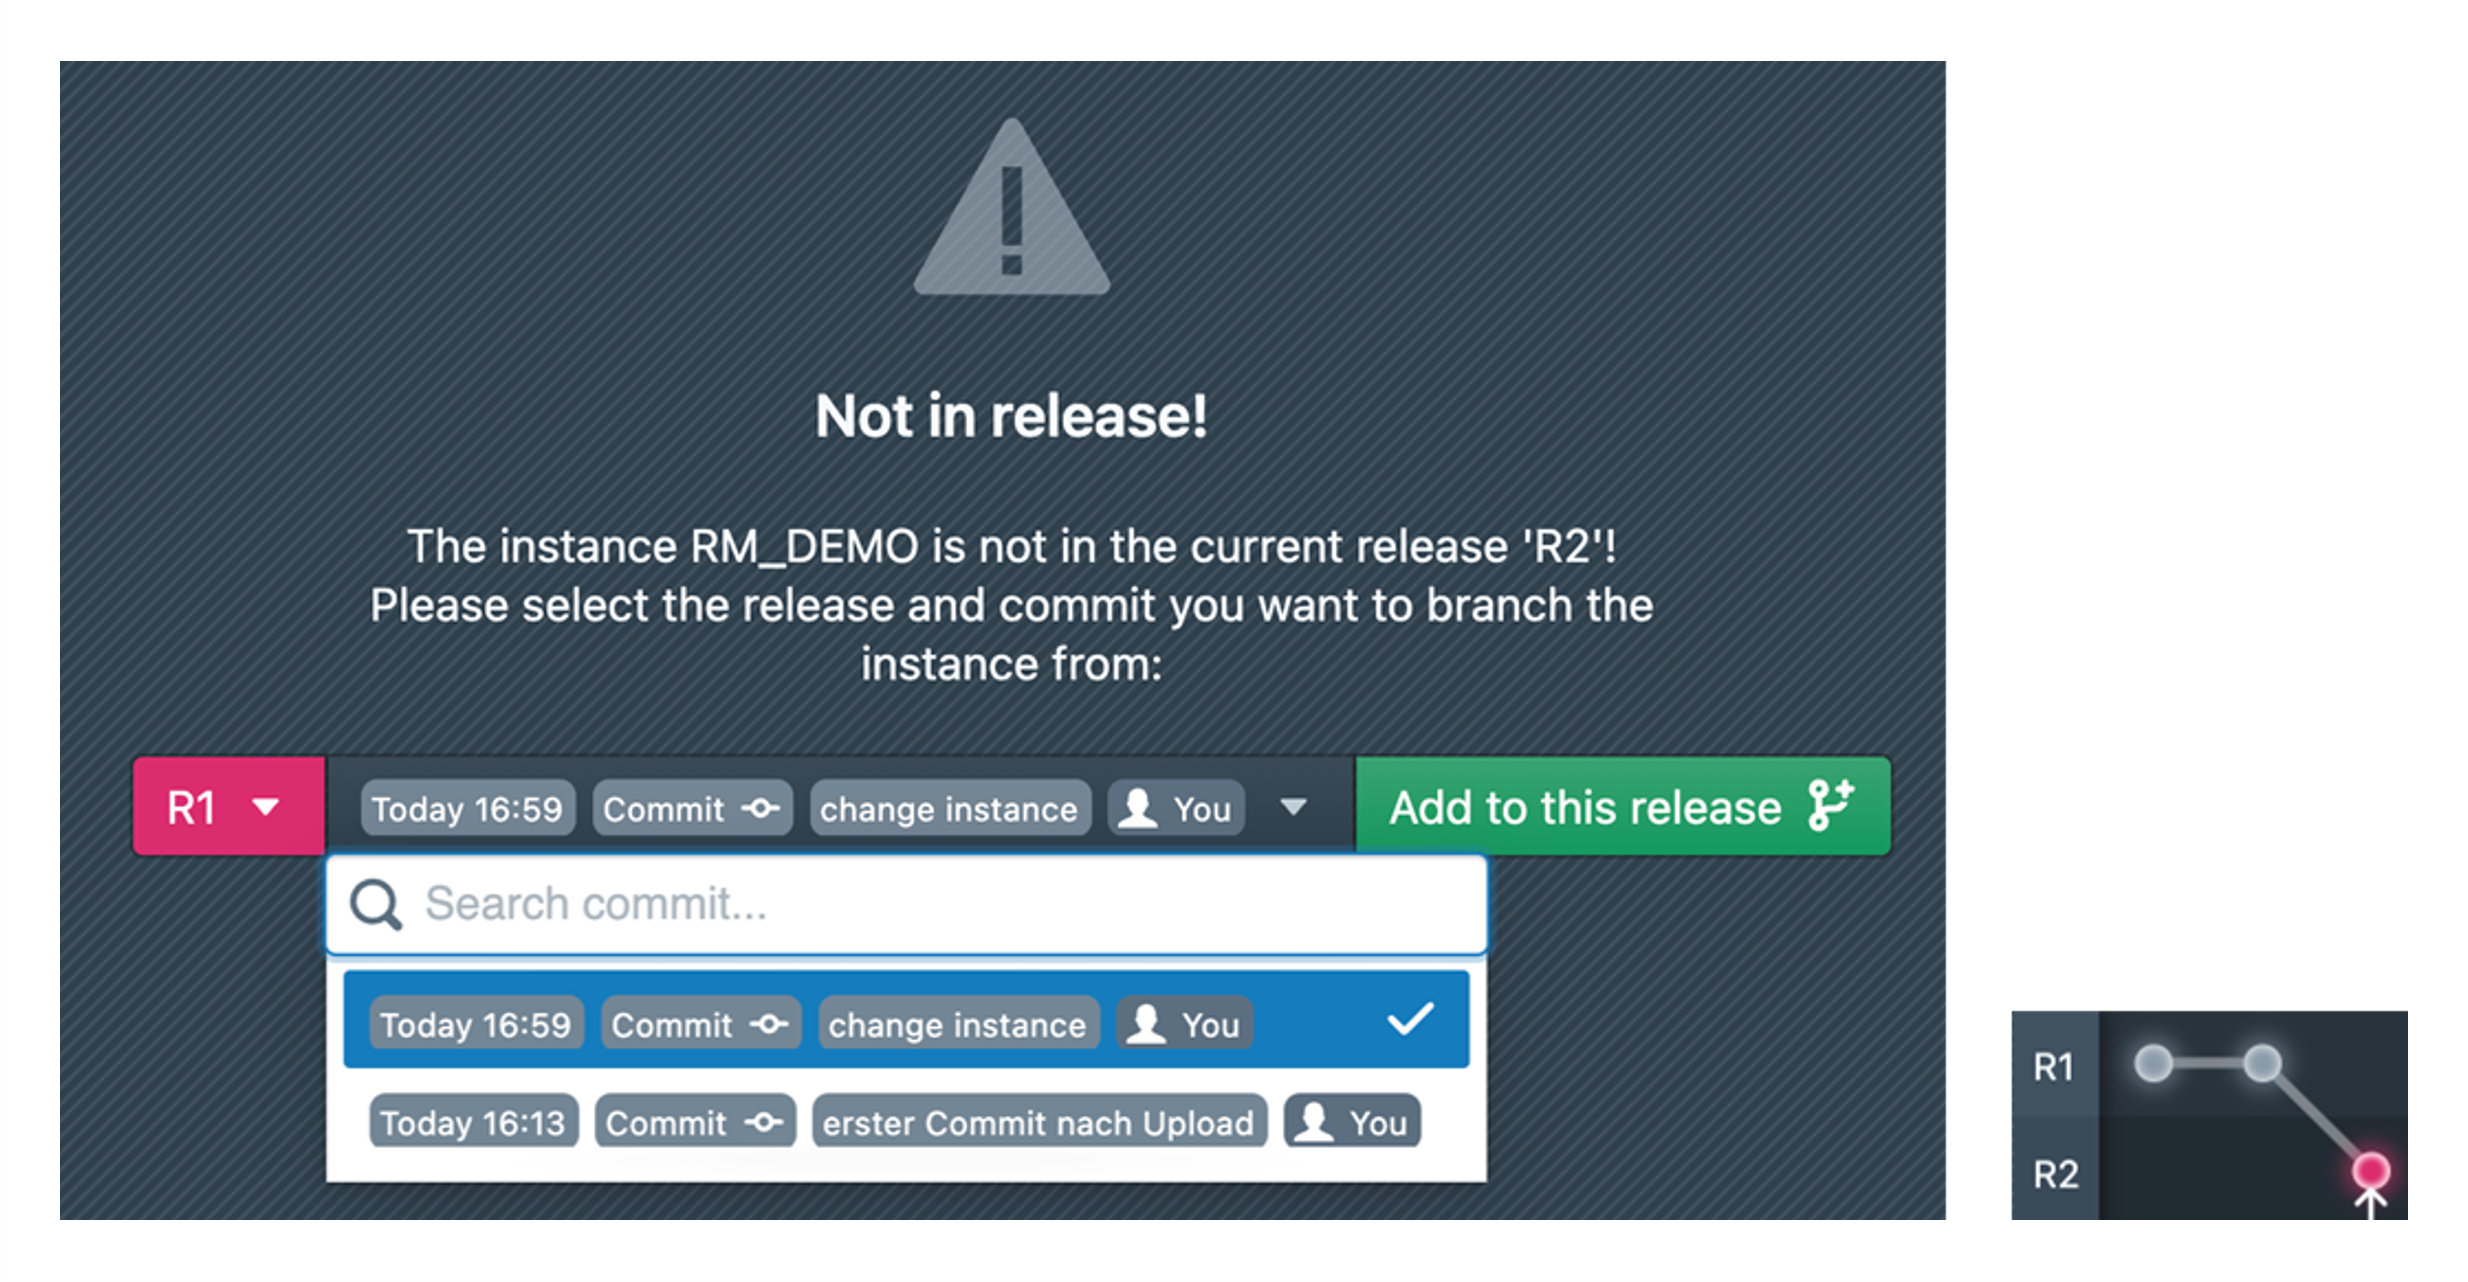
A first commit of the instance within the current release is now created, which has the same state as the commit just selected. The commit graph looks like the diagram on the right.
A special situation occurs when an instance has been created by upload, but no commit exists yet. The instance cannot yet be added to other releases. It must first be initially committed in the release in which the upload was performed so that there is a base commit. Instances in this situation are marked with a dark gray dot ![]() . The releases in which an upload exists are listed in the dialog that opens when you click on the instance. By clicking on "Go to Release" you can switch to the corresponding release. Alternatively, you can also use the release selection at the top of the menu bar.
. The releases in which an upload exists are listed in the dialog that opens when you click on the instance. By clicking on "Go to Release" you can switch to the corresponding release. Alternatively, you can also use the release selection at the top of the menu bar.
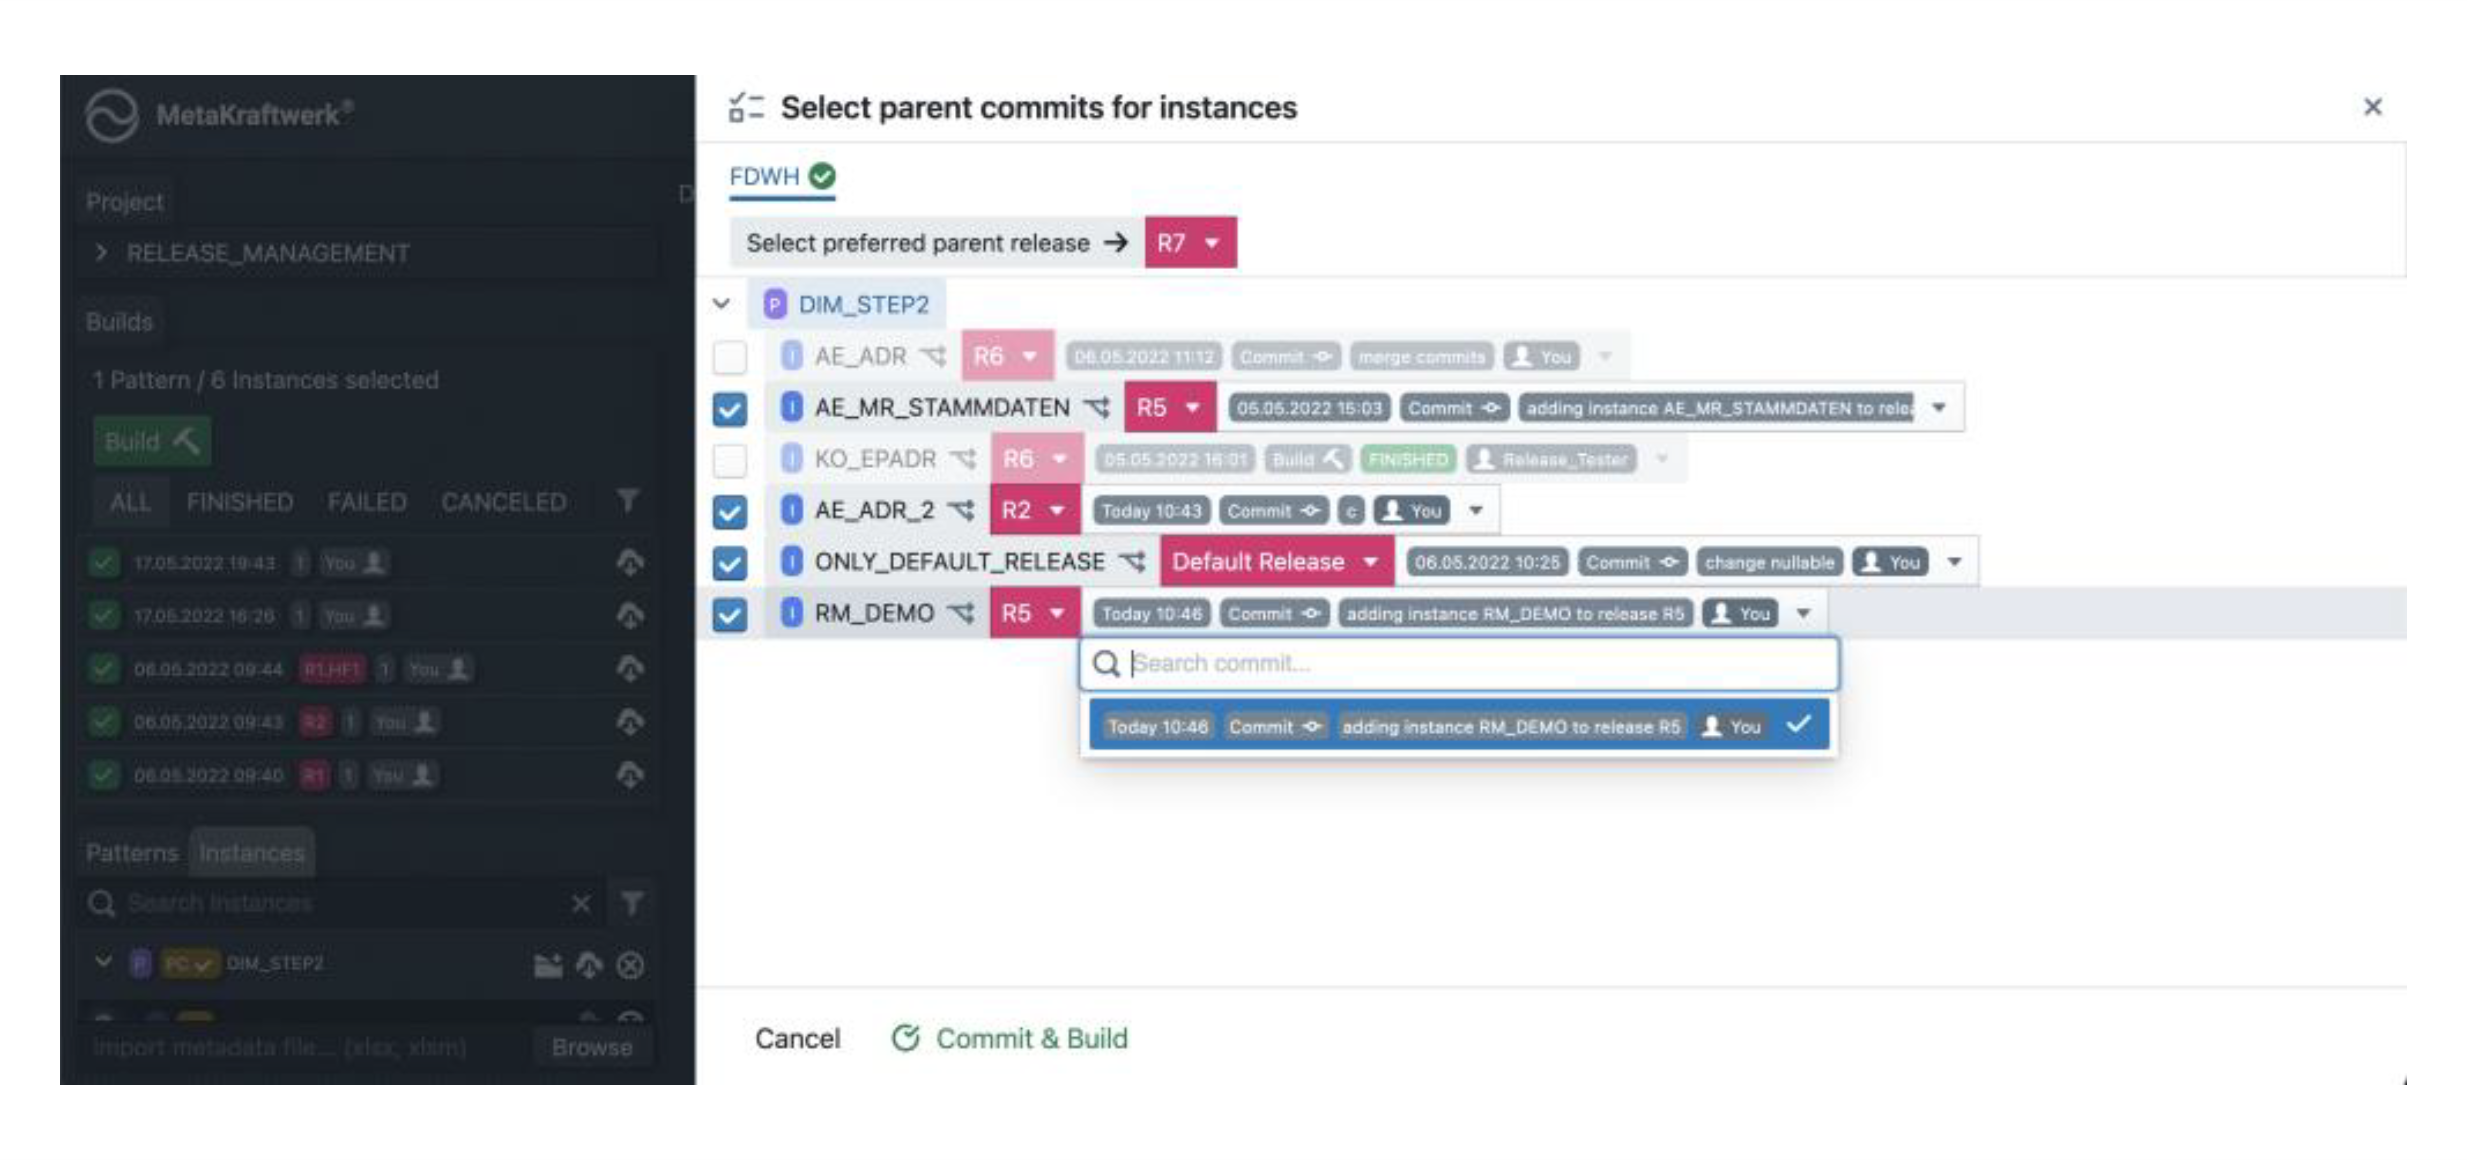
Special case: Implicit addition to the release by a build
If an instance is built that has not yet been added to the current release, it is initially questionable which version should be used for the build. Therefore, in this case a dialog opens (see screenshot below), in which for all instances for which this is the case, it must be selected from which release or commit it should be added to the current release and thus also built. This function is analogous to the one in the previous section, except that here the user can add all instances to the current release at once.