 MetaKraftwerk
Part 1 — Create a Pattern in MetaKraftwerk
Patterns are a set of templates and dynamic metadata expressions that define how data structures and transformations are created. They include the logic needed to generate schemas, code, ETL objects (Pipelines, Notebooks etc.) and configurations. Patterns are reusable and applicable across different sources and scenarios.
Note
For more information on patterns, see What is a pattern.
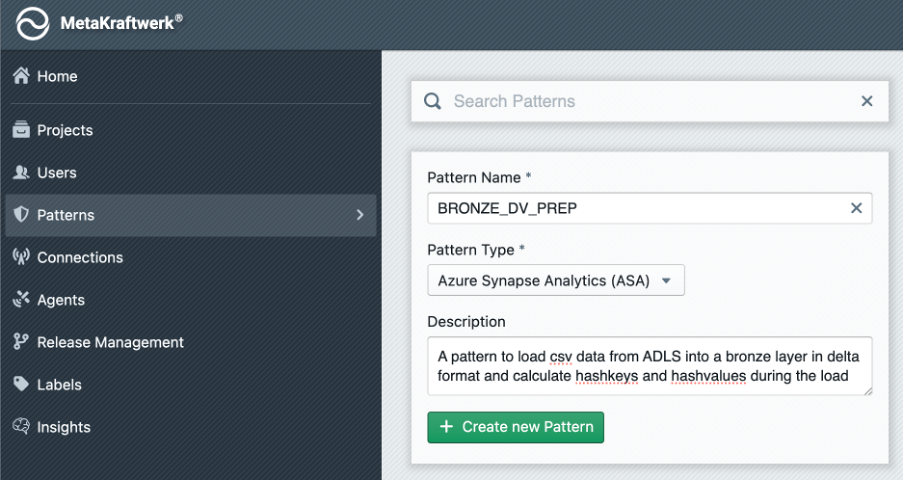
1. Create the Pattern
To start with the development, we first have to create a new pattern in MetaKraftwerk:
- Go to Home → Patterns → + Create new Pattern .
- Set the Name to:
BRONZE_DV_PREP - Set the Pattern Type to: Azure Synapse Analytics(ASA)
- Optional Description: “A pattern to load csv data from ADLS into a bronze layer in delta format and calculate hashkeys and hashvalues during the load”
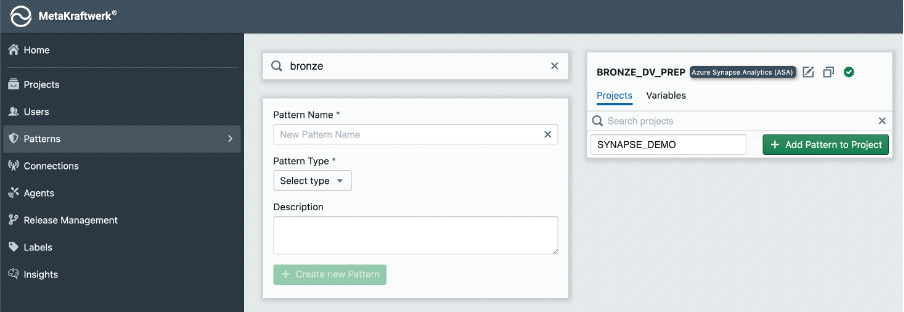
2. Add Pattern to Project
The pattern will not be visible to users and developers unless you add it to a project:
- Click on the Patterns Section in the sidebar → Search for your newly created pattern
BRONZE_DV_PREP→ Choose projectSYNAPSE_DEMO→ Click + Add Pattern to Project .
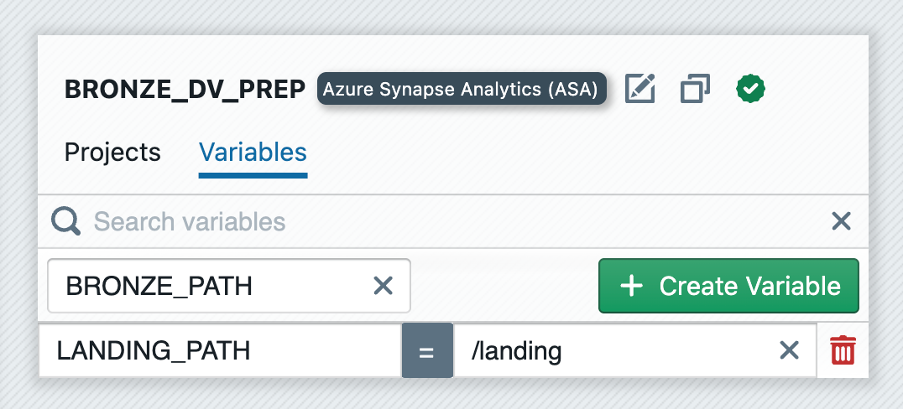
3. Create Pattern Variable
A pattern can have one or more variables that can be used to parameterize the pattern. The value of these variables can be set individually for each instance folder. When an instance is built, the folder's value is then used. In our example, we want to use variables to parameterize the landing and bronze paths.
- Switch to
Variablesin your pattern → Click + Create Variable → Set variable name toLANDING_PATHand the value to/landing.
4. Define Functional Roles
Within the Pattern, Functional Roles must be defined. These Functional Roles represent the different types of fields or parameters that can be configured for each instance. To create functional roles in MetaKraftwerk, follow the following steps using the provided screenshot as a guide:
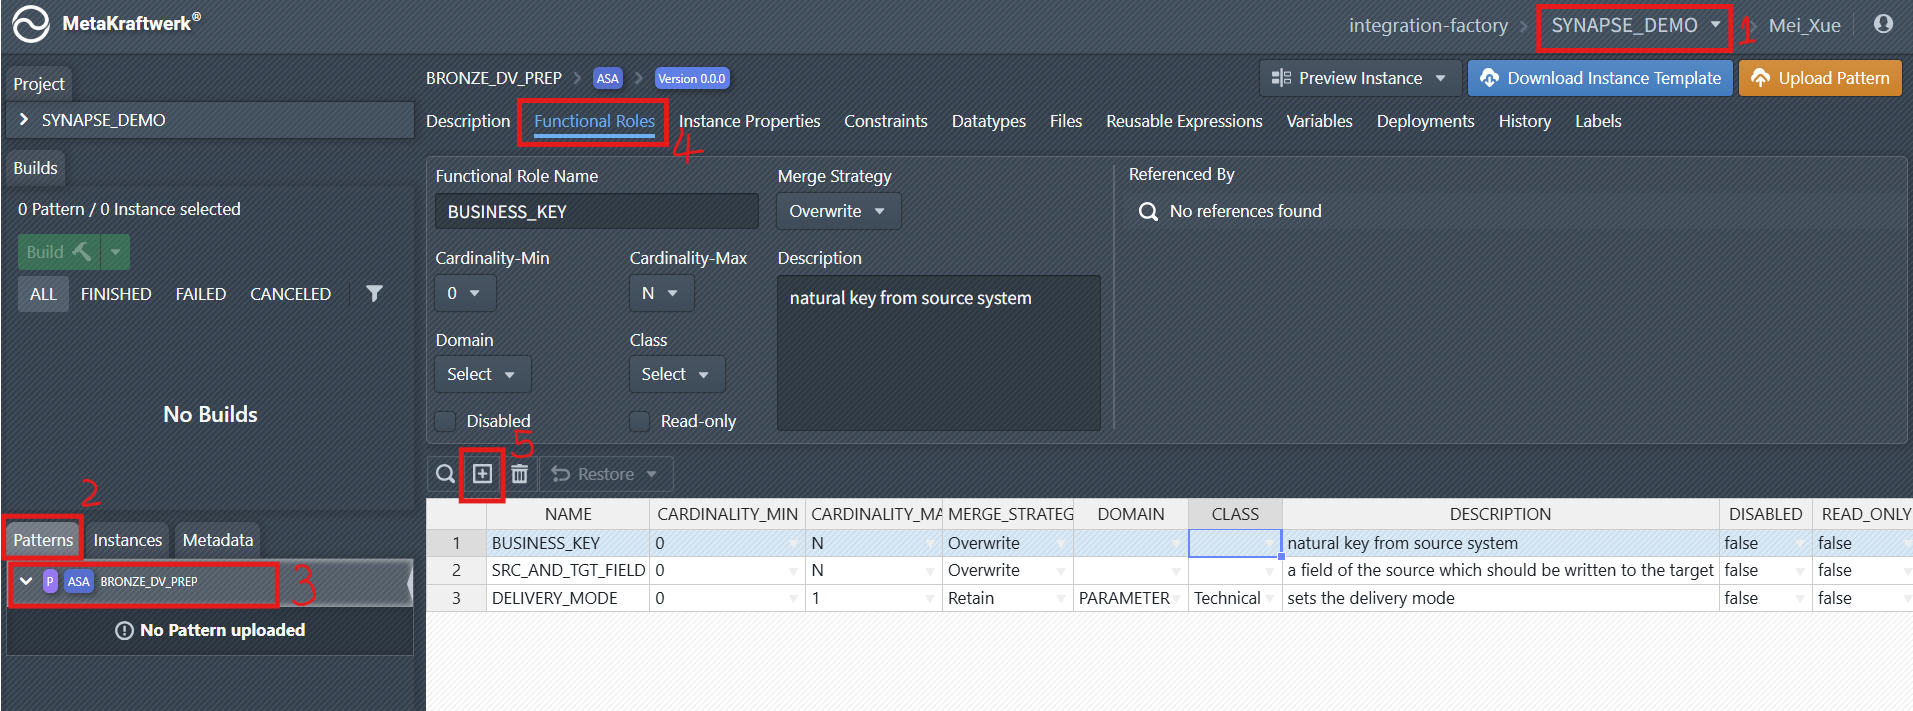
Select the Project: In the top-right corner of the MetaKraftwerk interface, use the project dropdown menu to select your target project (e.g.,
SYNAPSE_DEMOas shown).Navigate to the
PatternsSection: On the left-hand sidebar, click on thePatternstab. This displays all patterns available for the selected project.Select the relevant Pattern:
From the list of patterns (under the Patterns tab), choose the specific pattern where you want to create functional roles. In the screenshot, this is theBRONZE_DV_PREPpattern.Open the
Functional RolesTab: In the detail view of the selected pattern (BRONZE_DV_PREP), click on theFunctional Rolestab. This tab is where you define and manage functional roles for the pattern.Add New Functional Roles: In the
Functional Rolestab, click the plus sign icon to start creating a new functional role. Add the following roles:
- BUSINESS_KEY
- SRC_AND_TGT_FIELD
- DELIVERY_MODE
Configure the properties of the new functional role:
- Cardinality: How many values are allowed (e.g., 0..1, 0..N).
- Merge Strategy: How values are handled when merging (e.g., Overwrite, Add New, Retain).
- Domain/Class: (Optional) For further categorization or validation.
- Description: Explains the purpose of each role.
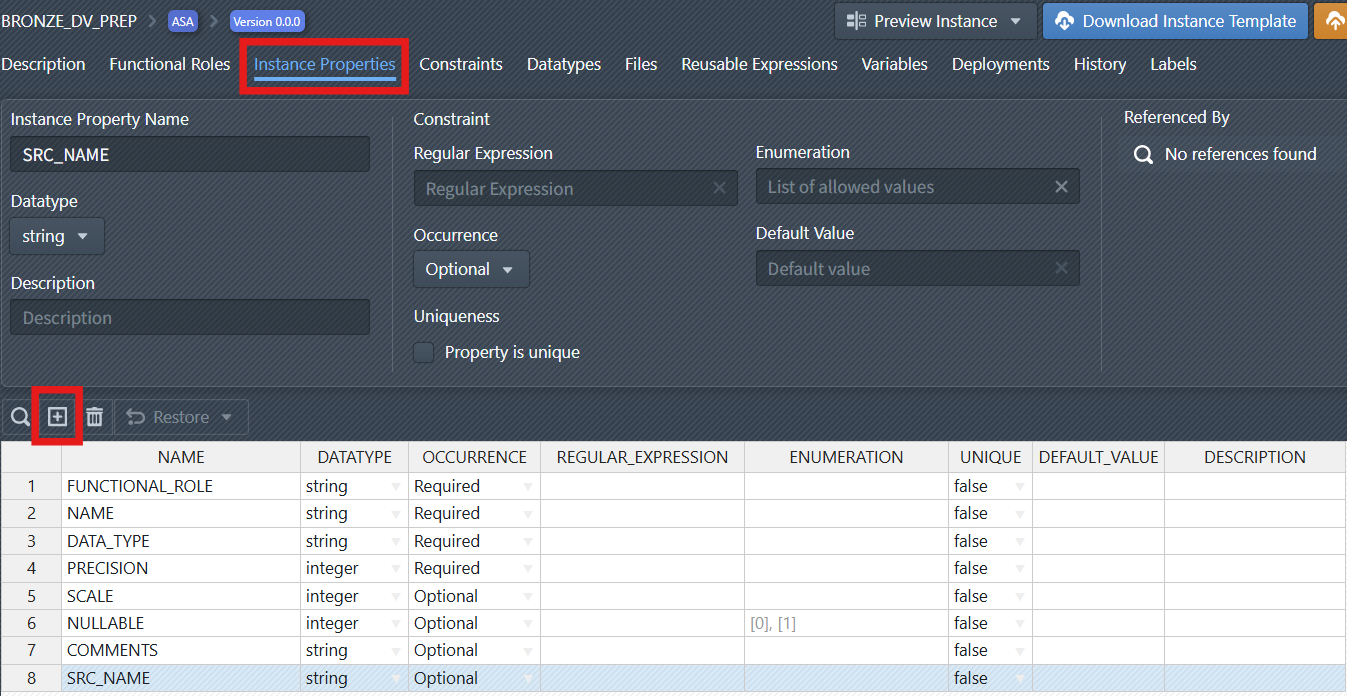
5. Add Instance Properties
Now you have to define Instance properties such as:
- FUNCTIONAL_ROLE (the role of the field)
- NAME (field name)
- DATA_TYPE (data type, e.g., string, integer)
- PRECISION, SCALE (for numeric fields)
- NULLABLE (whether the field can be null)
- COMMENTS (description)
- SRC_NAME (Field name in the source system)
These properties allow for flexible and precise configuration of how data is processed and mapped. Some of the above properties are already part of your pattern as default properties. But some of the above (e.g. COMMENTS and SRC_NAME) must be created.
Create a New Property: Click the plus sign icon ![]() to create a new instance property. You have to change the name of the instance property to a value such as
to create a new instance property. You have to change the name of the instance property to a value such as SRC_NAME. You can leave all other settings for the instance property for now.
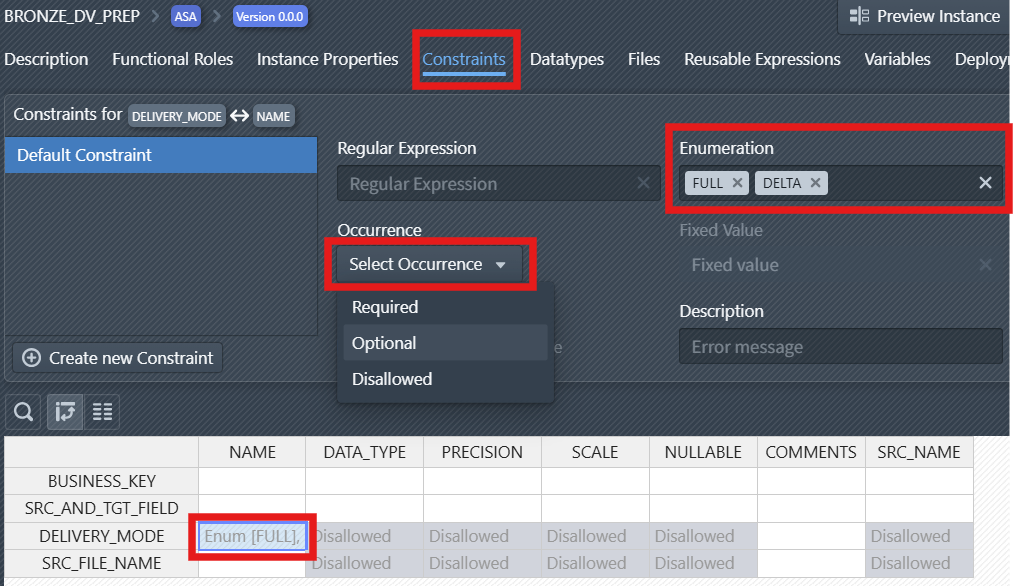
6. Set Constraints
Constraints can be set on roles and properties to enforce data quality and business rules. For example, certain fields or data types can be disallowed for specific roles, ensuring only valid configurations are used.
Select the Constraints tab to access constraint configuration options.
Set Occurrence Behavior: Use the "Select Occurrence" dropdown to define if a property of a Role is:
Required(must be present),Optional(may be present), orDisallowed(must not be present).
Define Enumeration Values: In the Enumeration field, specify the allowed values for the constrained item. In the screenshot, FULL and DELTA are added as valid options for the NAME of DELIVERY_MODE.
Tip
If you have defined a constraint for a combination of functional role and instance property and want to apply it to other roles or properties, you can just select the constraint in the table below, press Ctrl+C to copy the constraint, then go to another cell and press Ctrl+V to paste the constraint.